Dear Friend,
let’s make a collaged envelope using things you may already have at home.
If you scroll through Pinterest in search of DIY snail mail ideas, you’ll find countless beautifully decorated envelopes and collaged envelope designs.
Illustrations, calligraphy, sketches, collage and watercolour techniques turn ordinary envelopes into little works of art.
Sometimes, though, looking at all that creativity can be a little intimidating. You might find yourself thinking that you’ll never be able to make something quite as beautiful.
Well, I’m here to tell you that you absolutely can!
The beauty of creating something by hand lies in its individuality. You can find inspiration in someone else’s work, but your creation doesn’t have to look exactly like the original.
Improvise, add your own ideas and leave your mark on your little piece of art.
And when it comes to collage envelopes, this is especially true.
Finding all the little decorative elements you see in those beautiful Pinterest pictures can be surprisingly difficult. However, old postage stamps, vintage stickers, magazine clippings, decorative papers and other ephemera take time to collect. Buying everything for a single project can also become quite expensive, especially if you have to order supplies online and wait weeks for them to arrive.
A Little Creativity Goes a Long Way
I really wanted to add something special to my snail mail, and I was particularly keen on making a collaged envelope. Instead, I decided to work with what I already had at home: old magazine pages, a few leftover notes and some pretty little paper embellishments.
And finally, I had a handmade collaged envelope, created without spending a single penny on new supplies.
Today, I’m sharing the whole process with you. Let’s make one!
Supplies
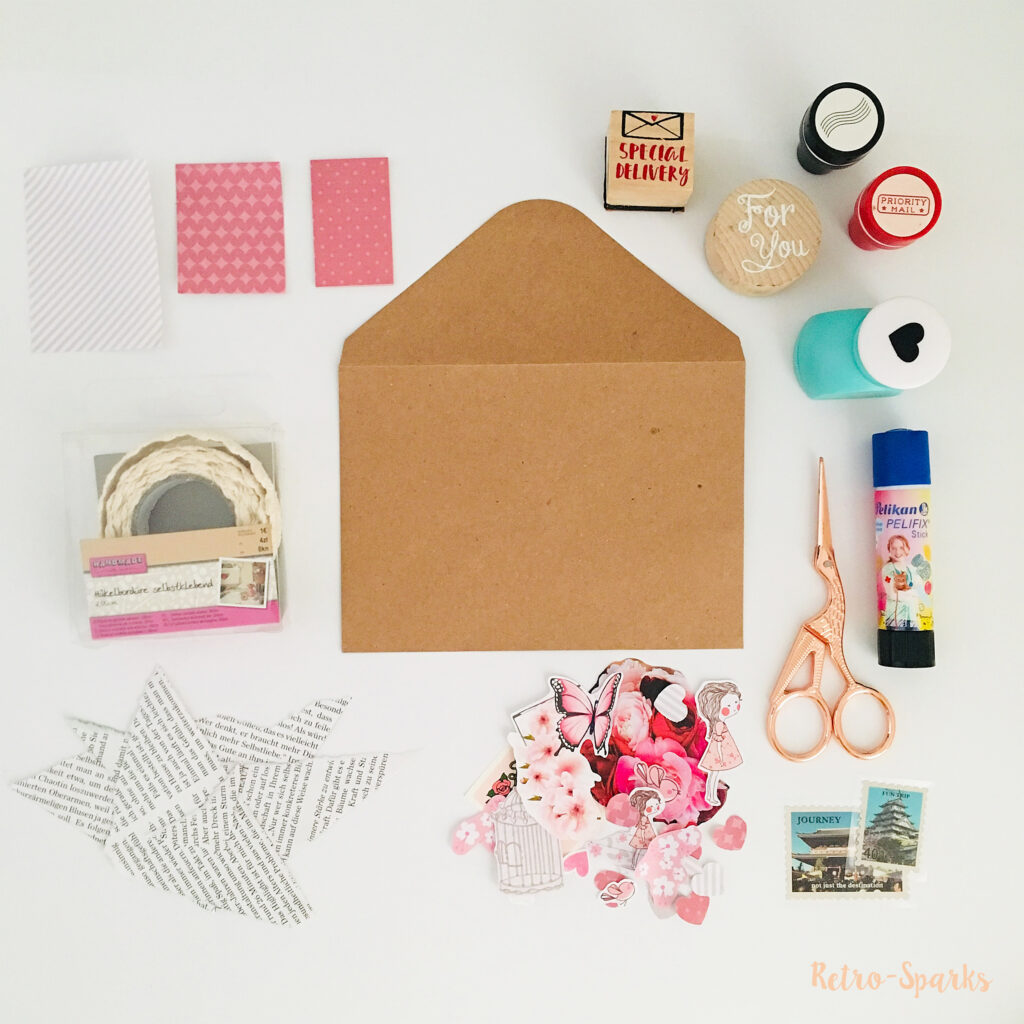
Luckily, you don’t need a lot of fancy materials for this project. Most of these things might already be hiding somewhere in your craft drawer.
- A square A7 or 5 × 7 envelope (although any envelope will do)
- Old magazine cutouts, such as text samples, flowers and illustrations
- Decorative paper cutouts from old notes (hearts, birds, butterflies and similar motifs)
- Sticky notes or small decorative labels (one grey, two pink and one floral)
- Old postage stamps (you can reuse some from your own mail)
- Lace tape
- Decorative stamps or seals (Special Delivery, Priority Mail and graphite-lined designs)
- Glue stick
- Scissors
- Mini heart punch (optional — you can cut out little hearts with scissors, too)
How to Make a Collaged Envelope
I’ve put together a step-by-step photo tutorial so you can follow the process more easily. Don’t worry about making everything look perfect. The whole point is to experiment and have fun!
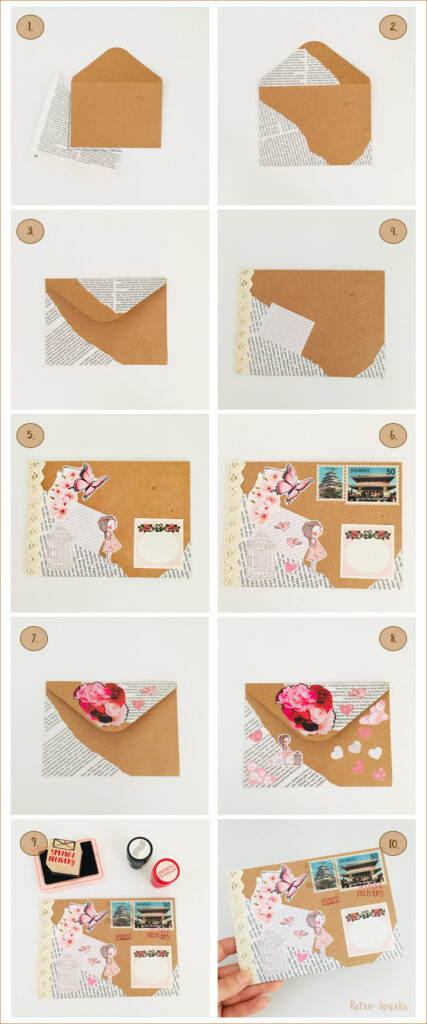
Step 1–3: Cover the envelope with magazine cutouts
Place your envelope over a page from an old magazine and trace around its shape. I used two separate pieces of magazine paper for the front of the envelope, and another piece for the back and the flap.
You can choose how much of the envelope you want to cover and experiment with different sizes and shapes of text cutouts.
Cut along the traced lines and glue the pieces onto the envelope. Make sure the paper follows the envelope’s shape neatly, especially around the edges and folds.
Step 4: Add a little lace and a label
Glue a strip of lace tape along the left edge of the front side, placing it right up to the edge of the envelope.
Next, add your grey note sticker or decorative label over the magazine cutout. This will give you a little space for the recipient’s address later.
Step 5–6: Decorate the front
Now comes my favourite part!
Choose a few magazine cutouts and arrange them on the envelope before gluing anything down. I used flowers, a pink butterfly, an old birdcage illustration and a little girl.
Once you’re happy with the arrangement, glue everything into place. Add a few smaller details to fill the empty spaces, then finish the front with a pretty address label and some old postage stamps.
Step 7–8: Decorate the envelope flap and back
Turn the envelope over and decorate the flap with magazine cutouts. I used a large floral illustration, a little bird and some hearts.
For the back of the envelope, I continued with the same collage style, combining flowers, a little girl and an old birdcage illustration. I also added a few smaller hearts and floral details to bring everything together.
Feel free to use whatever cutouts you have available. They don’t have to match mine!
Step 9: Add decorative stamps
Time for the finishing touches!
Use decorative stamps or seals to give your envelope that lovely vintage postal feel. I used Special Delivery, Priority Mail and a graphite-lined design.
You can experiment with different ink colours and stamp placements until you’re happy with the result.
Step 10: Your collaged envelope is ready!
And that’s it! Your little piece of handmade snail mail is ready to travel.
The Finished Envelope
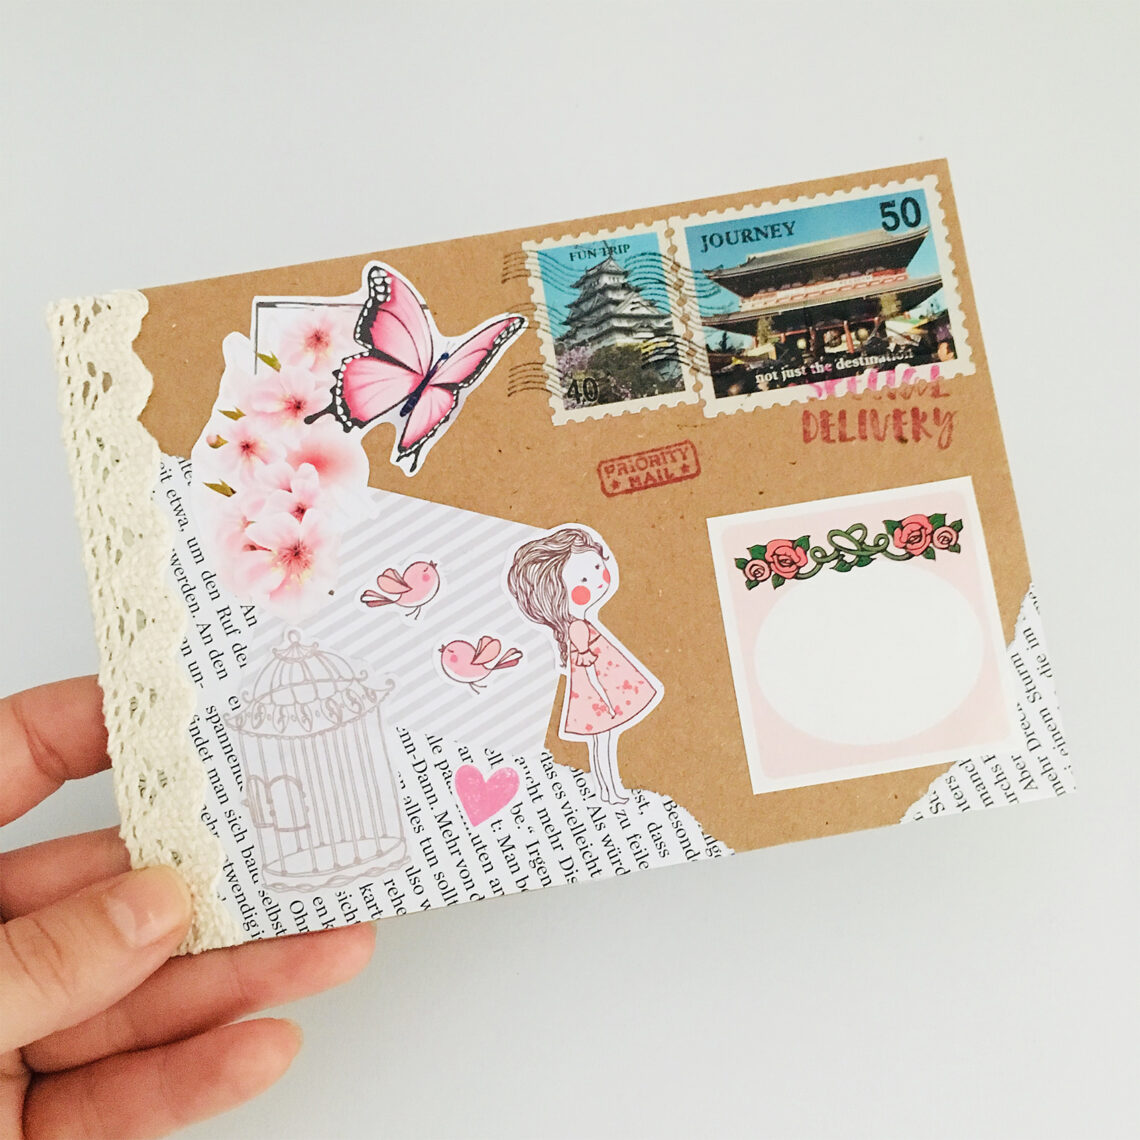
Here is how my collaged envelope turned out, front and back.
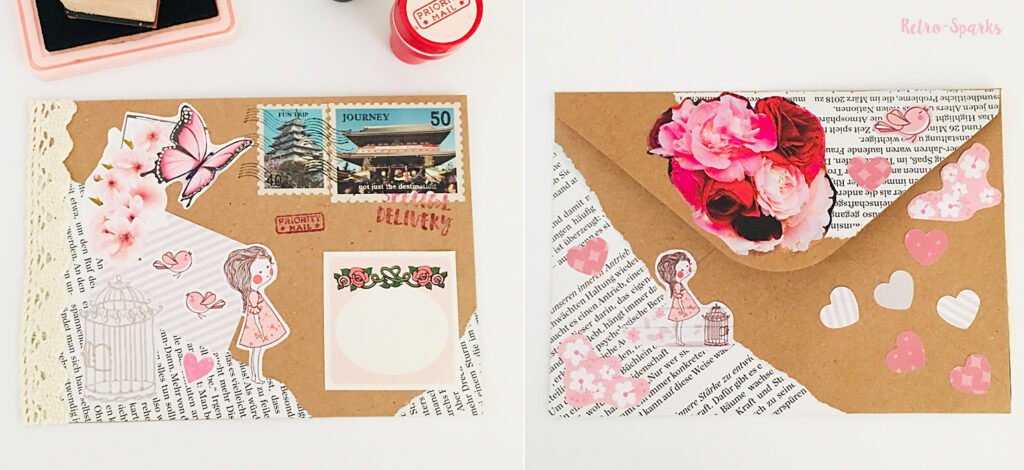
I love how the old magazine text, lace, postage stamps and pink illustrations came together. Every little detail adds something different, and that’s exactly what makes handmade projects so special.
I hope you’ve enjoyed this tutorial and feel inspired to give it a try.
Improvise, play with your ideas, use whatever little treasures you have at home and add a little bit of pixie dust to your creations.
And don’t forget to save your favourite ideas to Pinterest!
If you’re looking for even more snail mail inspiration, take a look at my Artsy Correspondence & Snail Mailing Pinterest board, where you’ll find plenty of lovely ideas for creative letter writing.
Thanks for stopping by!
Happy crafting! ✄
Love,

P.S. Don’t forget to subscribe to Retro-Sparks to get access to the Freebie Library! You’ll find a growing collection of printable goodies, including envelope liners, rose gold postcards, birthday card decorations, mini Polaroid frames, vintage letter forms, stationery templates and much more.
